
Have your kitchen’s colors left you feeling blah or embarrassed about your home's top gathering spot? Maybe you’re dying to cover dated orange wood cabinets or want to repair chips and scuffs that have marred the wall paint. Many military homeowners change cabinet and wall colors because it’s the simplest way to get the feel of a complete kitchen redo without spending thousands on a renovation.
Painting your cabinets and walls is affordable and definitely a manageable DIY home decorating project, but don’t underestimate the amount of work required to pull off a masterful finish. Plan for several days to clean walls, remove cabinet doors, prep, paint, and rehang for the best outcome.
Top Kitchen Paint Colors
After hours of scanning Pinterest, you probably already have a favorite color or two in mind for your kitchen. So why not start there? One of the biggest influences the years during and after the pandemic had on everyone’s hearts and minds was the importance of embracing what makes you happy, and this extends to this type of affordable home décor.
However, if you’re looking for longevity and a neutral backdrop that embraces a wide range of home decorating styles, you’ll probably want to stick with kitchen color classics. Or, if you’re considering a not-so-far-away home sale, think of these go-to colors as tips for staging your house to sell.
- White: timeless look, warm and creamy, not bright with a blue tinge
- Taupe: light, customizable, plays well with many floor and counter colors
- Navy: pure classic, adds color without the overwhelm when used in the right amount
- Gray: pale, powdery, neutral, avoid too much saturation, and paint the entire kitchen the same shade
Should I Repaint My House Before Selling? Maybe. It depends on your goals. Reading Get Ready to Sell Your House will help you decide.
Paint Your Kitchen Cabinets
It’s time-consuming to paint cabinets, but oh so worth the effort. Let’s break the process down step by step.
1. Choose your paint formula and finish.
You’ve narrowed down a few color choices; now it’s time to choose the next most important feature: the paint formula that works best for your cabinets, as well as the finish or sheen (matte, eggshell, satin, semi-gloss, or high gloss).
It used to be that oil-based paints were the go-to for cabinet paint, but the list of cons is so long that even professionals have moved away from using them. As an average painter, just avoid oil-based paints. They’re unhealthy, hard to clean up, and a pretty finish is hard to come by.
What is My Home Decor Style? Find your answer in How to Decorate Your Home.
Formula Type
Your two choices come down to water-based latex paint, which is also commonly used on walls and is a good choice for many projects. Or you can choose a new paint product called acrylic alkyd paint that mixes the best qualities of latex and oil-based paint. It’s easy to clean, doesn’t emit many VOCs (Volatile Organic Compounds), and has excellent coverage and staying power.
All of the major brands have paint with this technology, and some products like Valspar Oil-Enriched Enamel and Benjamin Moore Advance have the primer included—perfect one-stop shopping at the home improvement store!
Pick Your Sheen
How shiny do you want your cabinets? It’s up to you, but the most common sheens are semi-gloss and satin because they’re durable and clean well. Matte products highlight marks and distress, while high gloss shows off fingerprints.
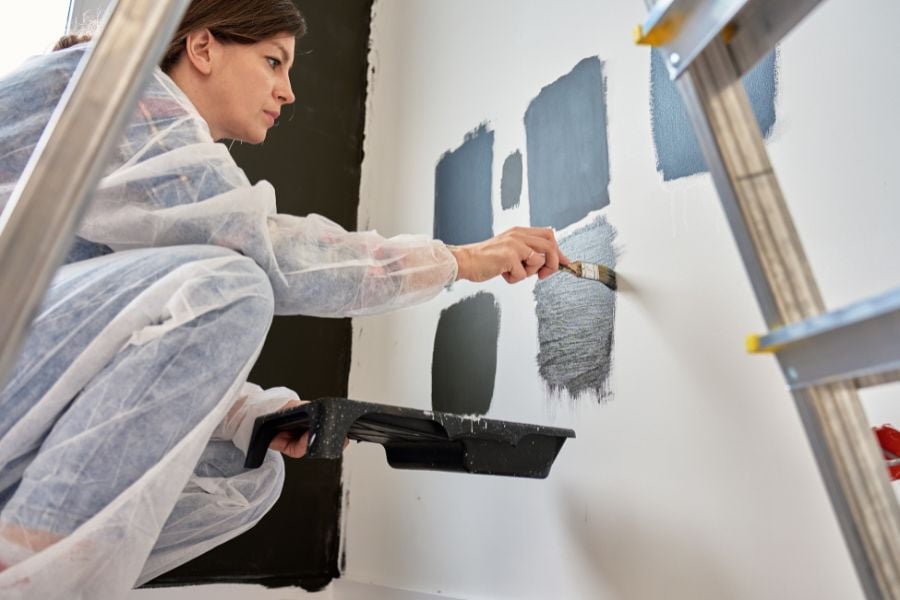 Photo by aliaksandrbarysenka via Canva.com
2. Organize and Prep Before You Paint
As excited as you are to add your new favorite color to your cabinets, slow down and do the hard work first, so the painting process is easier.
Start by mapping your cabinets and labeling each door, so you’ll know how to reassemble. Take pictures to help you remember where each piece of hardware fits if you have different styles.
- Clean each surface with a degreaser for the most paint-sticking power.
- Sand the surfaces lightly for extra grip and use a tack cloth to remove excess dust.
- If you choose a separate primer, apply it first.
- After each light layer of paint is sprayed, rolled, or brushed on, lightly sand again and repeat the painting process until you achieve the smooth topcoat finish you're looking for.
Paint Your Kitchen Walls
The good news is that, after painting your cabinets, painting your walls is a breeze! But, you might want to consider the walls a separate project if you’re tired after painting the cabinets. You don’t want to hurry just to get it all done in a weekend. Painting walls is an affordable home decor project that you can take on during any free stretch of time.
Take the professional color stylist’s advice and stick with the color family they suggest (on color strips or in paint brochures, in-store or online) for cabinets. It’s the easiest way to select a color for the walls and trim that coordinates with the cabinets. Or, choose the reverse: wall paint first, then decide cabinet color. However, painting the cabinets first is easier.
- The prep work starts by cleaning the walls with a degreaser and filling holes and smoothing cracks with spackle.
- You’ll probably need a primer or an all-in-one product to get the job done. Follow the same guidance for painting the cabinets for formula and sheen suggestions.
- If your hand isn’t steady, use painter’s tape to paint a straight edge where the trim and ceiling meet the walls.
- Take your time and use multiple-sized rollers to cover the walls nicely. Invest in the best tools you can afford for the best finish.
There’s no better time than now to invest in your home. Between family meals, study sessions, and work meetings, your kitchen works hard for your family. Give it the paint refresh it deserves!